A day in the life of Red Gate via MQTT
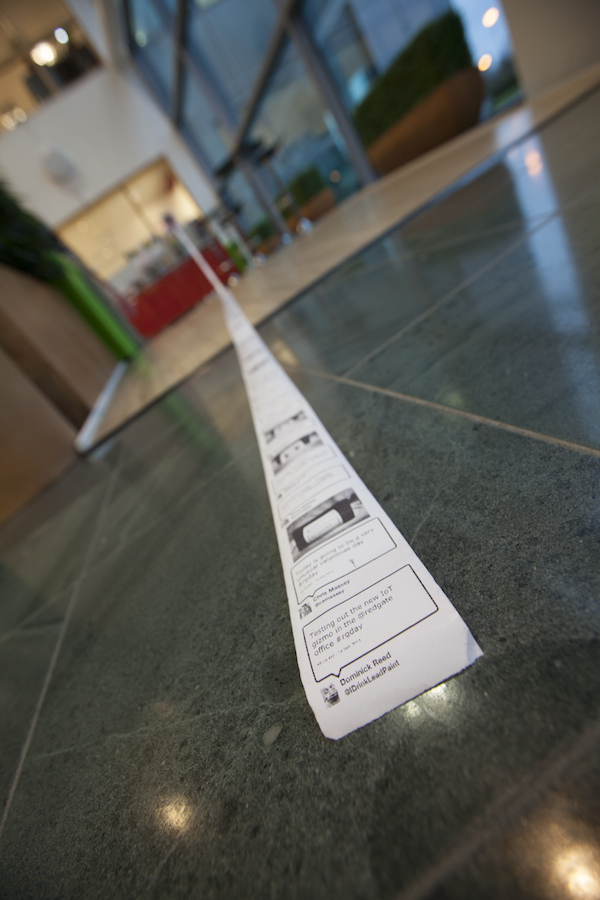
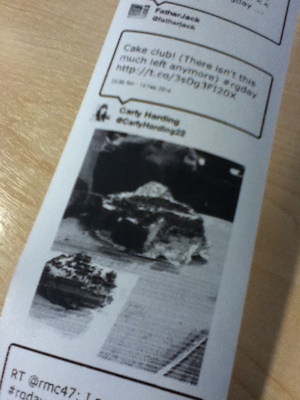
On the 14th of February, I did my first digital installation at Red Gate’s offices. For one day only, a small Adafruit receipt printer sat in Red Gate’s cafe faithfully printing out anything hashtagged with #rgday. Everyone in the office was encouraged to tweet about their day.
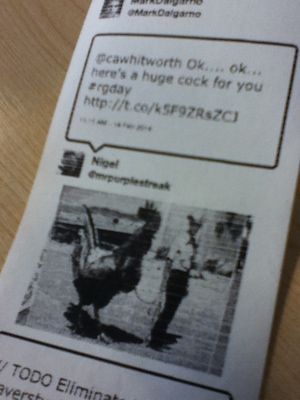
Eight hours later we had a snapshot of a typical Red Gate day and a predictable insight into our culture. True to form, we were only 12 tweets in when a giant cock appeared:
Behind the scenes, the printer was a proof of concept of a lightweight Arduino MQTT endpoint which was fed printable bitmaps by a backend partnership of RabbitMQ, PhantomJS, Sinatra and Qswarm. What follows is a deeper look at the architecture of the setup:
The first step is to generate a web page for a tweet which can be
printed on the 384 pixel wide monochrome thermal printer using Adafruit’s library. Using Twitter’s REST API and some simple CSS,
a Ruby Sinatra script runs a web server on port 4567
listening for URLs of the form http://localhost:4567/:id and returning
an appropriately formatted web page such as this:
(A gist for this code can be found here)
Meanwhile a Qswarm (Ruby stream processing DSL) script listens for the #rgday hashtag on Twitter injecting the tweet ids onto a RabbitMQ queue:
agent :twitter do
  connect :twitter,
          :type               => :twitter,
          :consumer_key       => 'XXX',
          :consumer_secret    => 'XXX',
          :oauth_token        => 'XXX',
          :oauth_token_secret => 'XXX',
          :track           => {
            :rgday           => ['#rgday']
          }

  connect :printer,
          :type               => :amqp,
          :uri                => 'guest:guest@localhost:5672/',
          :exchange_type      => :topic,
          :exchange_name      => 'printer',
          :queue_args         => { :exclusive => false }

  source  :twitter do
    sink  :printer,
          :format             => :raw,
          :routing_key        => 'tweets' do
      payload.data[:id]
    end
  end
end
Another Qswarm agent listens for the ids the first script is emitting and uses PhantomJS
running in webdriver mode (phantomjs --webdriver=4444) to fetch the
tiny webpage version of the tweet and take a screenshot.
Using Imagemagic, this image is converted and dithered to a nice
monochrome bitmap the printer can use and injected raw into a MQTT queue for printing.
require "RMagick"
require 'selenium-webdriver'

agent :printer do
  @driver = Selenium::WebDriver.for :remote, :url => 'http://localhost:4444'
  @driver.manage.window.resize_to(384, 100)

  connect :printer,
          :type            => :amqp,
          :uri             => 'guest:guest@localhost:5672/',
          :exchange_type   => :topic,
          :exchange_name   => 'printer',
          :queue_args      => { :exclusive => false },
          :subscribe_args  => { :ack => true },
          :prefetch        => 5,
          :bind            => '#',
          :format          => :raw

  connect :mqtt,
          :type            => :amqp,
          :uri             => 'guest:guest@localhost:5672/',
          :exchange_type   => :topic,
          :exchange_name   => 'amq.topic',
          :format          => :raw,
          :bind            => 'outTopic'

  source :printer do
    sink :mqtt,
         :format           => :raw,
         :routing_key      => 'inTopic' do

      @driver.get("http://localhost:4567/#{payload.raw}")
      img = Magick::Image.from_blob(@driver.screenshot_as(:png)).first
      img.colorspace = Magick::GRAYColorspace

      # MONO is LSB, Adafruit library expects MSB so unpack and pack
      [img.columns, img.rows].pack("SS") + img.rotate(180).normalize.ordered_dither('h4x4a').to_blob { self.format = 'MONO' }.unpack('b*').pack('B*')
    end
  end
end
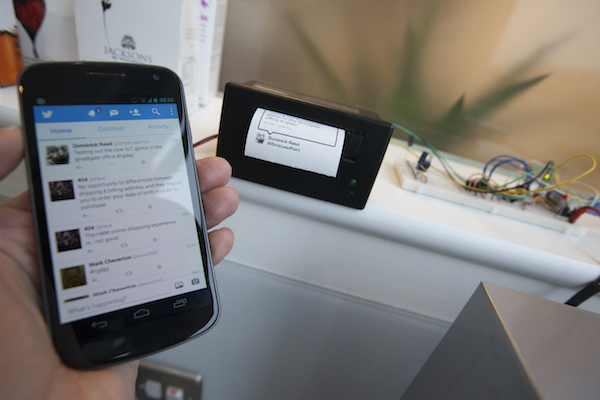
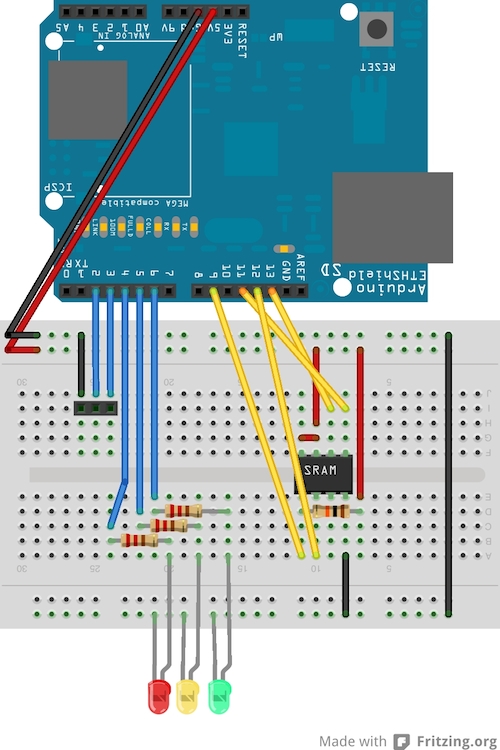
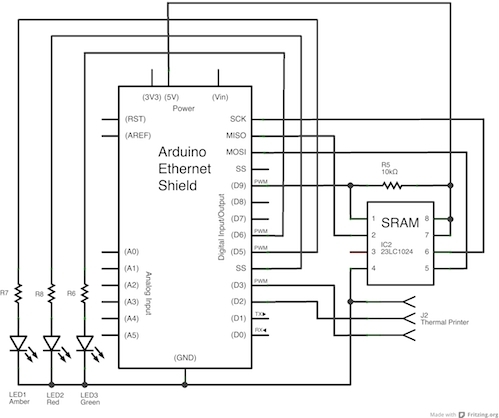
The end device is an Arduino which receieves the monochrome bitmaps from RabbitMQ via MQTT. Because these are too large for the Arduino to hold in memory, and the thermal printer prints quite slowly, the image is written out into SRAM and then fed to the thermal printer. QoS1 is used to limit the Arduino to processing only one message at a time and avoid being overwhelmed by a tide of tweets. Finally a few LEDs are added to indicate the state of the printer.
Here’s the code running on the Arduino, I’ve compressed this down by removing error handling and serial output to concentrate on the core concepts. It uses a forked version of Adafruit’s Thermal library to make the chunkheight configurable so that the printer isn’t overwhelmed by the bitmaps:
#include <SoftwareSerial.h>
#include <SPI.h>
#include <Ethernet.h>
#include <SRAM.h>
#include <Adafruit_Thermal.h>
#include <PubSubClient.h>

int printer_RX_Pin = 5;  // This is the green wire
int printer_TX_Pin = 6;  // This is the yellow wire

uint8_t SRAM_CS_PIN = 4;

int red_led_pin   = 7;
int amber_led_pin = 8;
int green_led_pin = 9;

byte mac[] = { 0xDE, 0xAD, 0xBE, 0xEF, 0xFE, 0xED };
EthernetClient ethClient;
byte mqtt_server[] = { 10, 120, 105, 128 };

SRAM sram(SRAM_CS_PIN, SRAM_1024);
Adafruit_Thermal printer(printer_RX_Pin, printer_TX_Pin);

void callback(char* topic, byte* payload, unsigned int length) {
  digitalWrite(amber_led_pin, HIGH);

  sram.seek(1);
  printer.wake();
  printer.printBitmap(&sram);
  printer.sleep();

  // Reset position
  sram.seek(1);
  digitalWrite(amber_led_pin, LOW);
}

PubSubClient mqttClient(mqtt_server, 1883, callback, ethClient, sram);

void setup(){
  Serial.begin(9600);

  pinMode(red_led_pin, OUTPUT);
  pinMode(amber_led_pin, OUTPUT);
  pinMode(green_led_pin, OUTPUT);

  digitalWrite(red_led_pin, HIGH);
  digitalWrite(green_led_pin, HIGH);
  digitalWrite(amber_led_pin, HIGH);

  printer.begin();
  printer.setTimes(30000, 2100);
  printer.setMaxChunkHeight(100);
  printer.sleep();

  Ethernet.begin(mac);
  initNetwork();

  sram.begin();
  sram.seek(1);

  mqttClient.connect("arduinoClient")
  mqttClient.subscribe("inTopic", 1);

  digitalWrite(red_led_pin, LOW);
  digitalWrite(green_led_pin, LOW);
  digitalWrite(amber_led_pin, LOW);
}

void loop() {
  if (printer.hasPaper()) {
    if (mqttClient.loop()) {
      digitalWrite(red_led_pin, LOW);
      digitalWrite(green_led_pin, HIGH);
    } else {
      digitalWrite(green_led_pin, LOW);
      digitalWrite(red_led_pin, HIGH);
    }
  } else {
    digitalWrite(green_led_pin, LOW);
    digitalWrite(red_led_pin, HIGH);
  }
}
By the end of the day we had over 200 tweets and 30 feet of printout - a lot of fun and a successful demonstration of MQTT in action.